Automating simple tasks
I’m a big fan of automating as much as possible when it comes to work. Even simple tasks can add up if you have to do them repeatedly. That’s why I often create scripts to do things for me—even silly things. Below you will find some info on how to use Automator on Mac OS to help you save some time.
Copy file path
We often need to copy the path to a given folder or file. This takes a couple of steps: get info (or Cmd + i), then manually copy the path using your mouse. If you use Terminal, this is a quick and easy task, but there’s a quicker way to accomplish this using Automator.
What I do is simple: to copy the path to a file, I click on the file and press Cmd + Shift + y, a shortcut I added to my Quick Actions (created with Automator). Here’s how to do it:
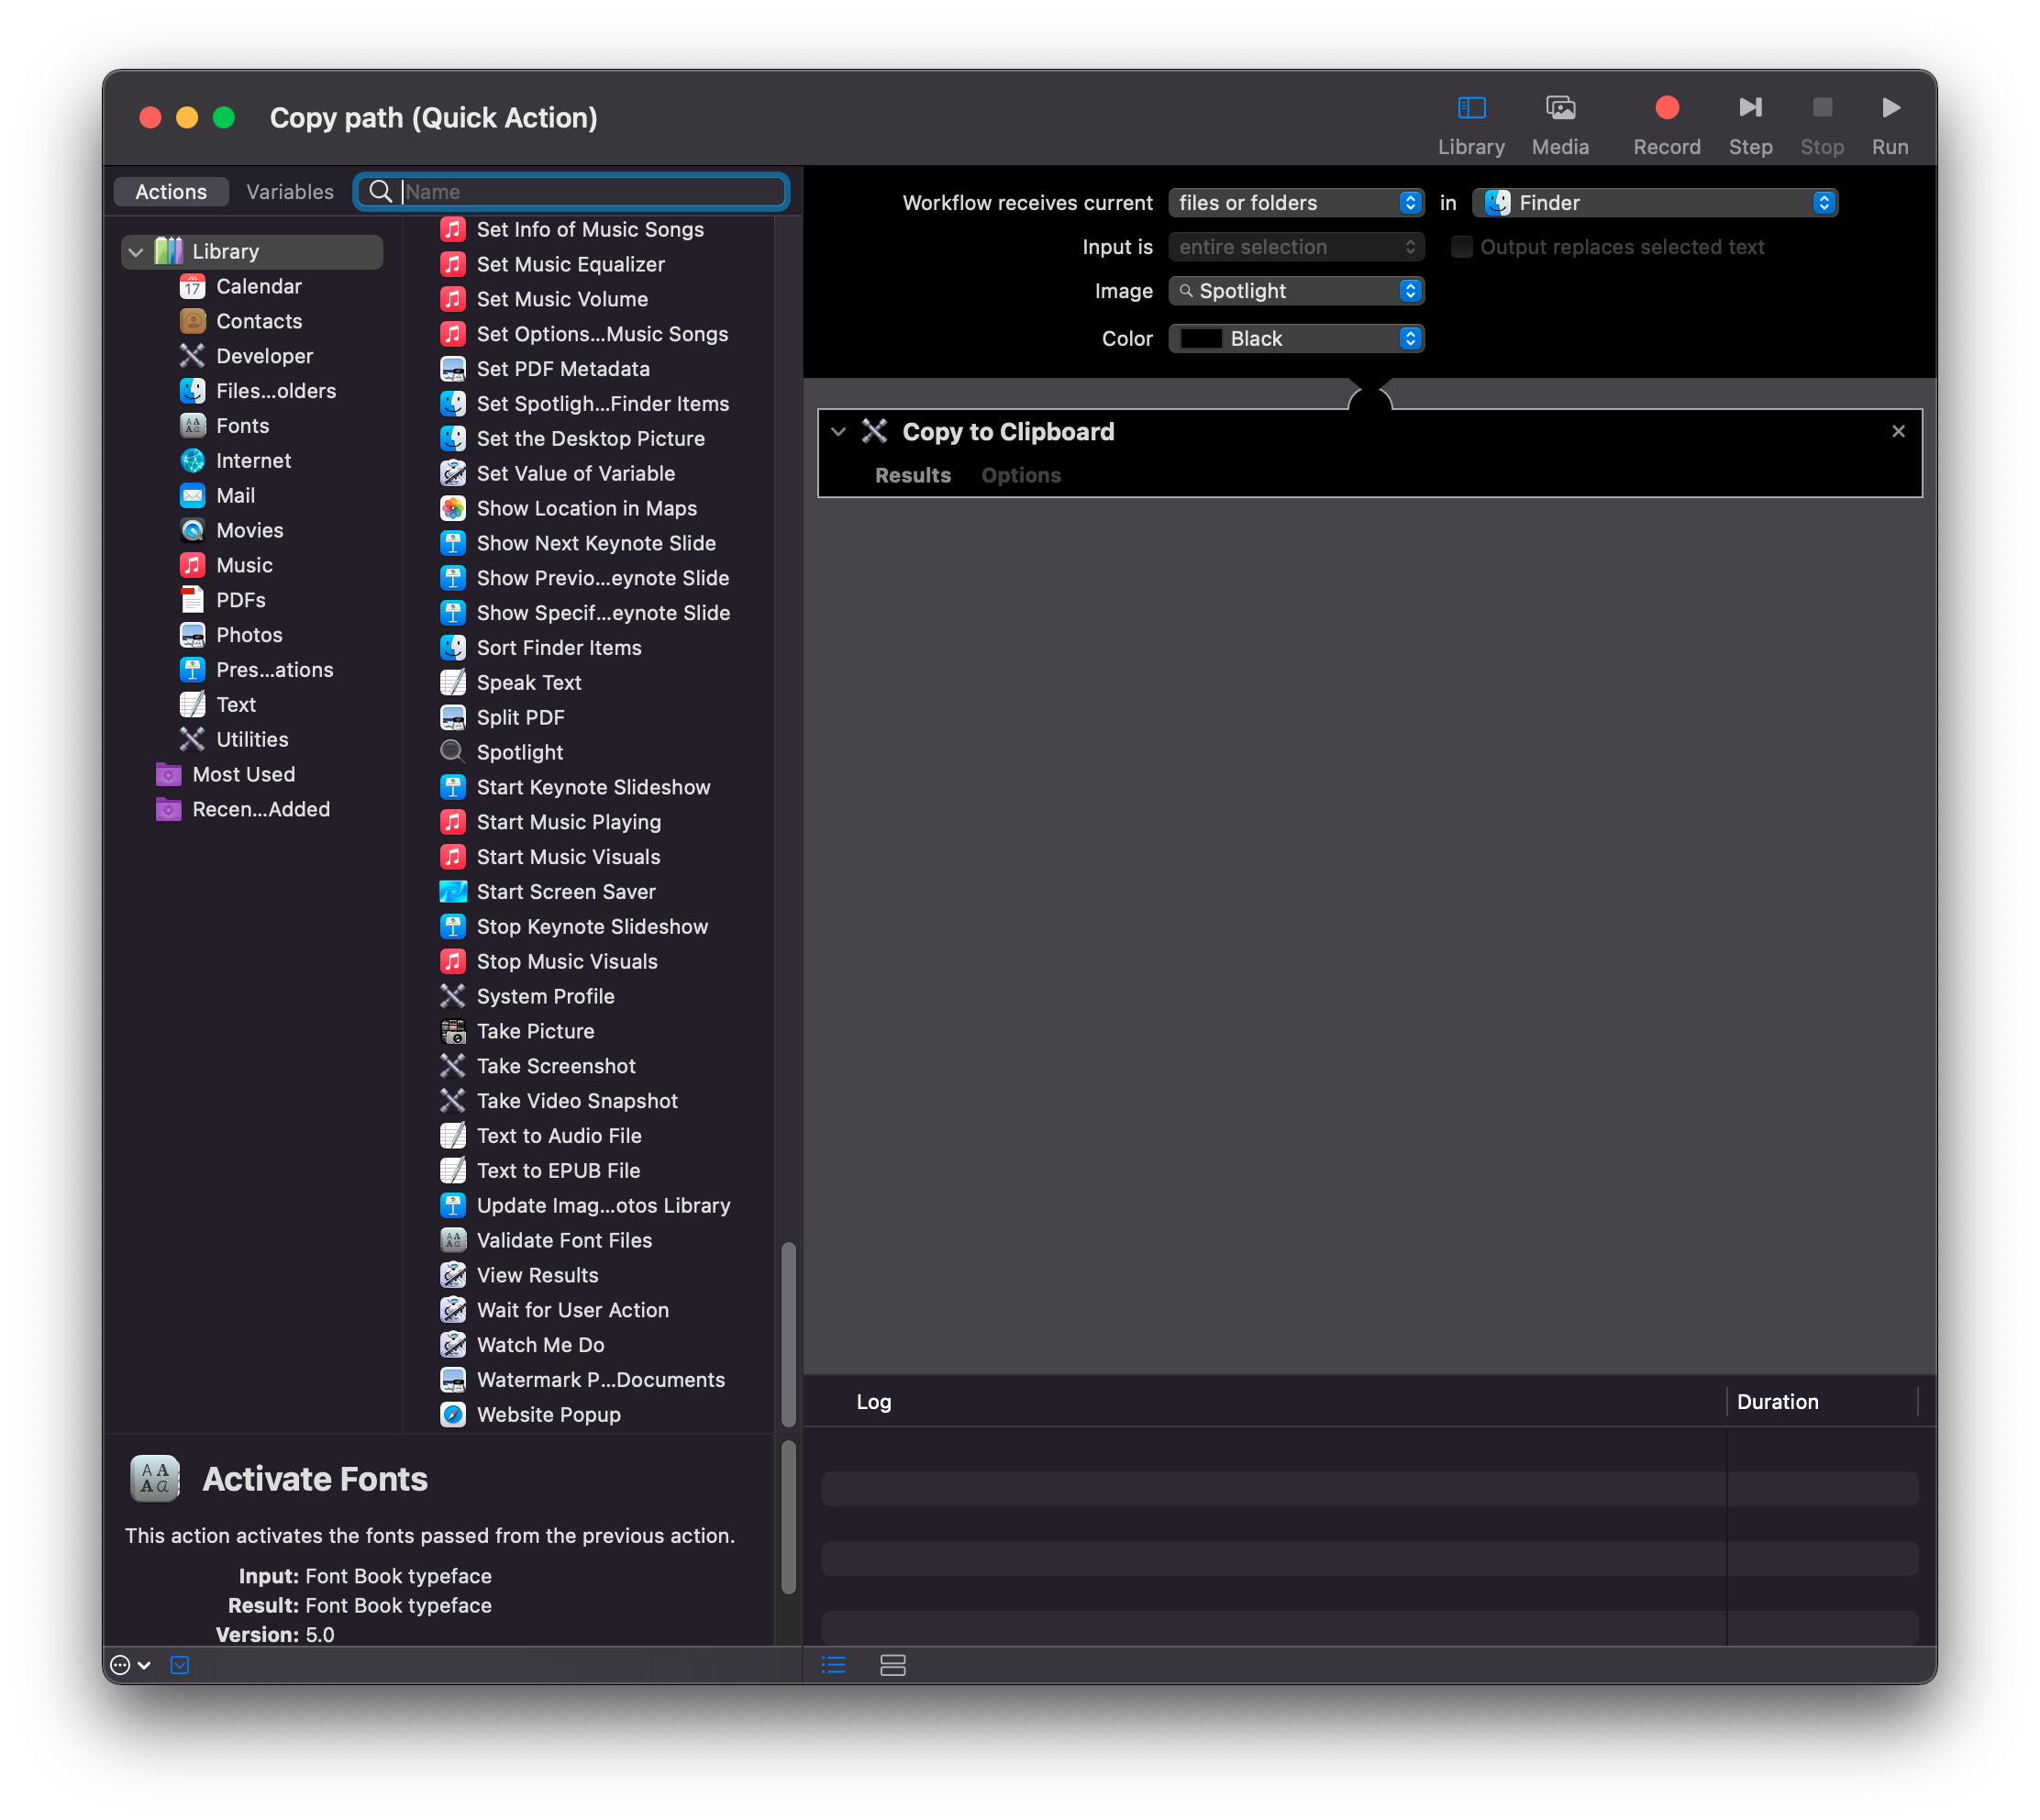
- Open Automator and create a new Quick Action
- At the top: Workflow receives current
files or foldersinFinder - Then search for
Copy to Clipboardand drop the action into the main pane - Save file
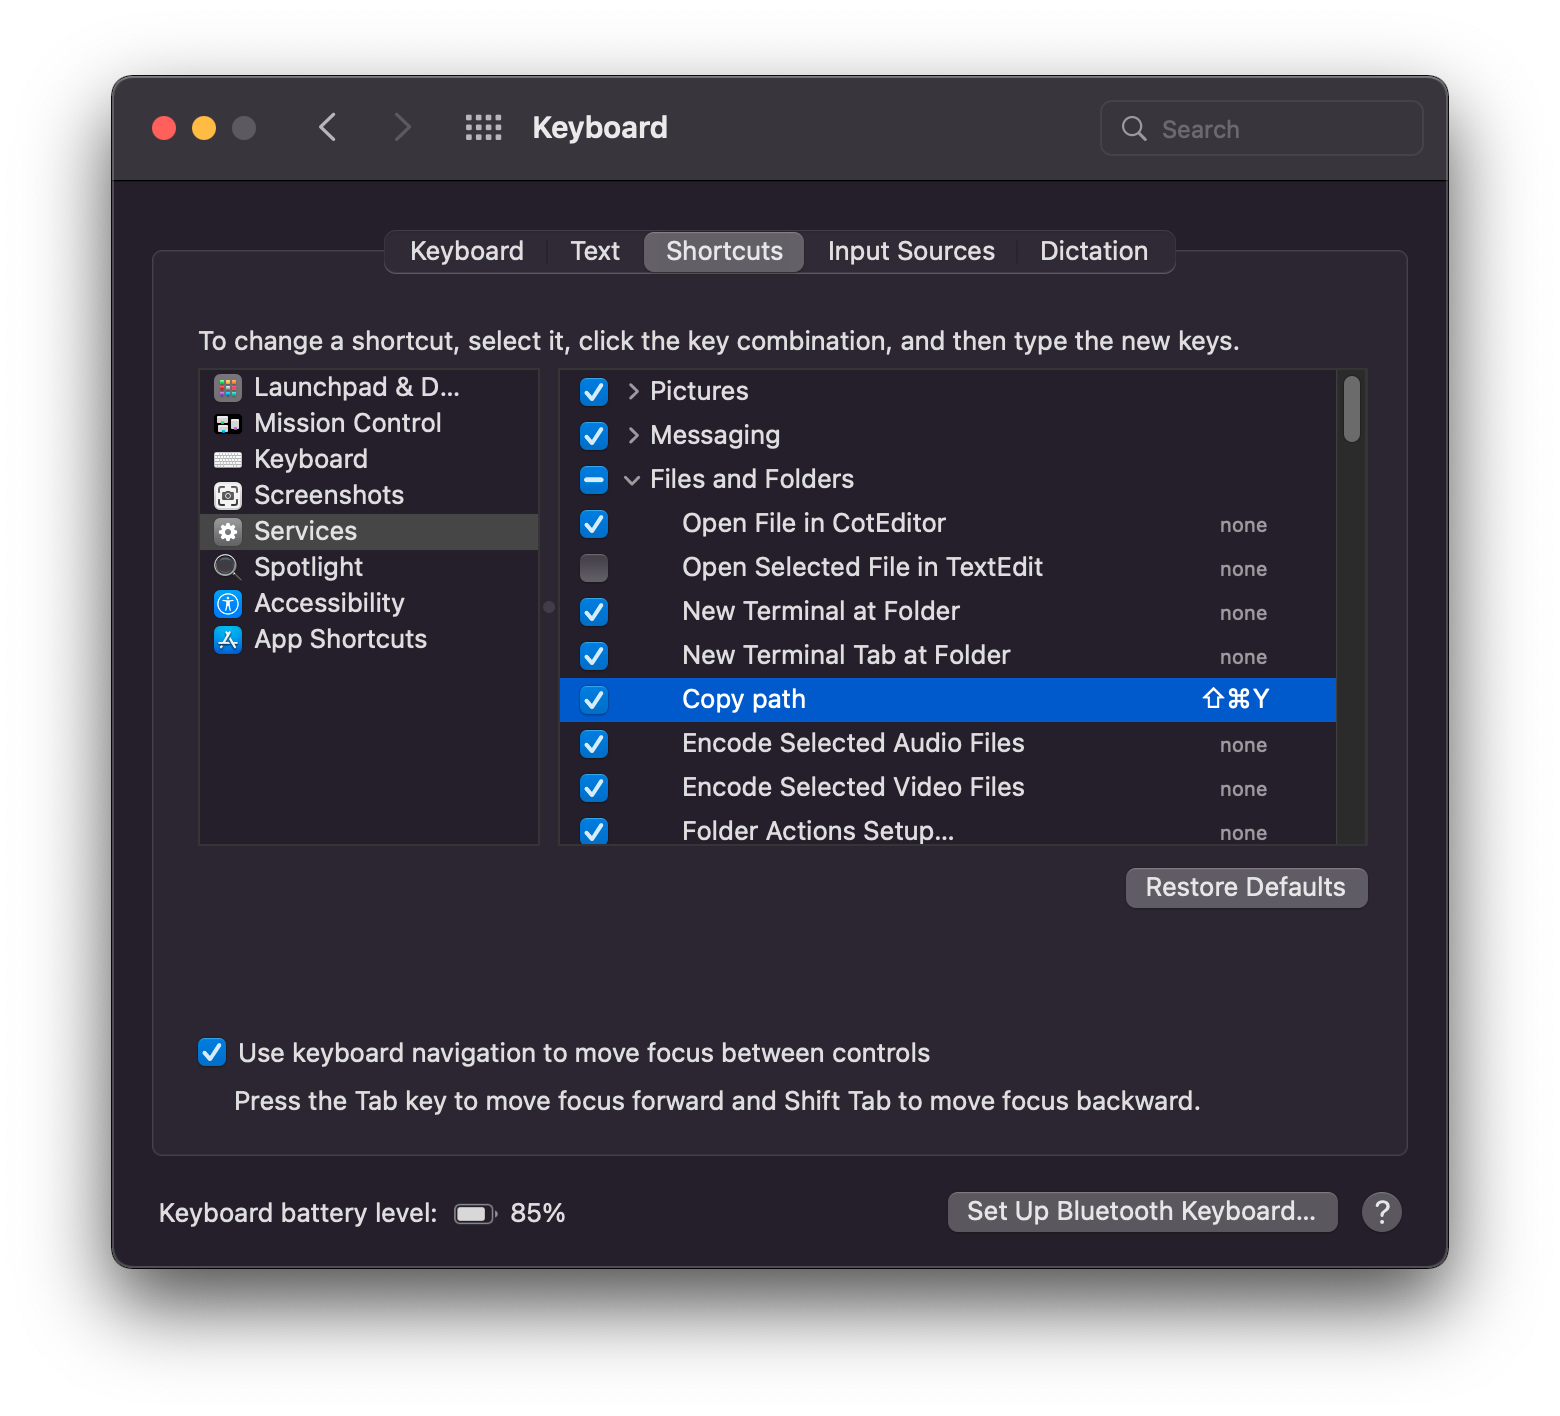
- Open System Preferences > Keyboard > Shortcuts > Services
- Under Files and Folders, add your shortcut of choice
Convert files
I often have to transform PDFs to JPEGS (or vice versa). This can be very annoying if your PDF has multiple pages. Again, you could use the Terminal (e.g., using imagemagick). But we could do it in Automator as well, and simply use a shortcut to convert any file. For example, if I click on a PDF file with 7 pages and hit Cmd + Shift + j, every page will be converted to a JPEG file, and all files will be saved in my Desktop with a given resolution.
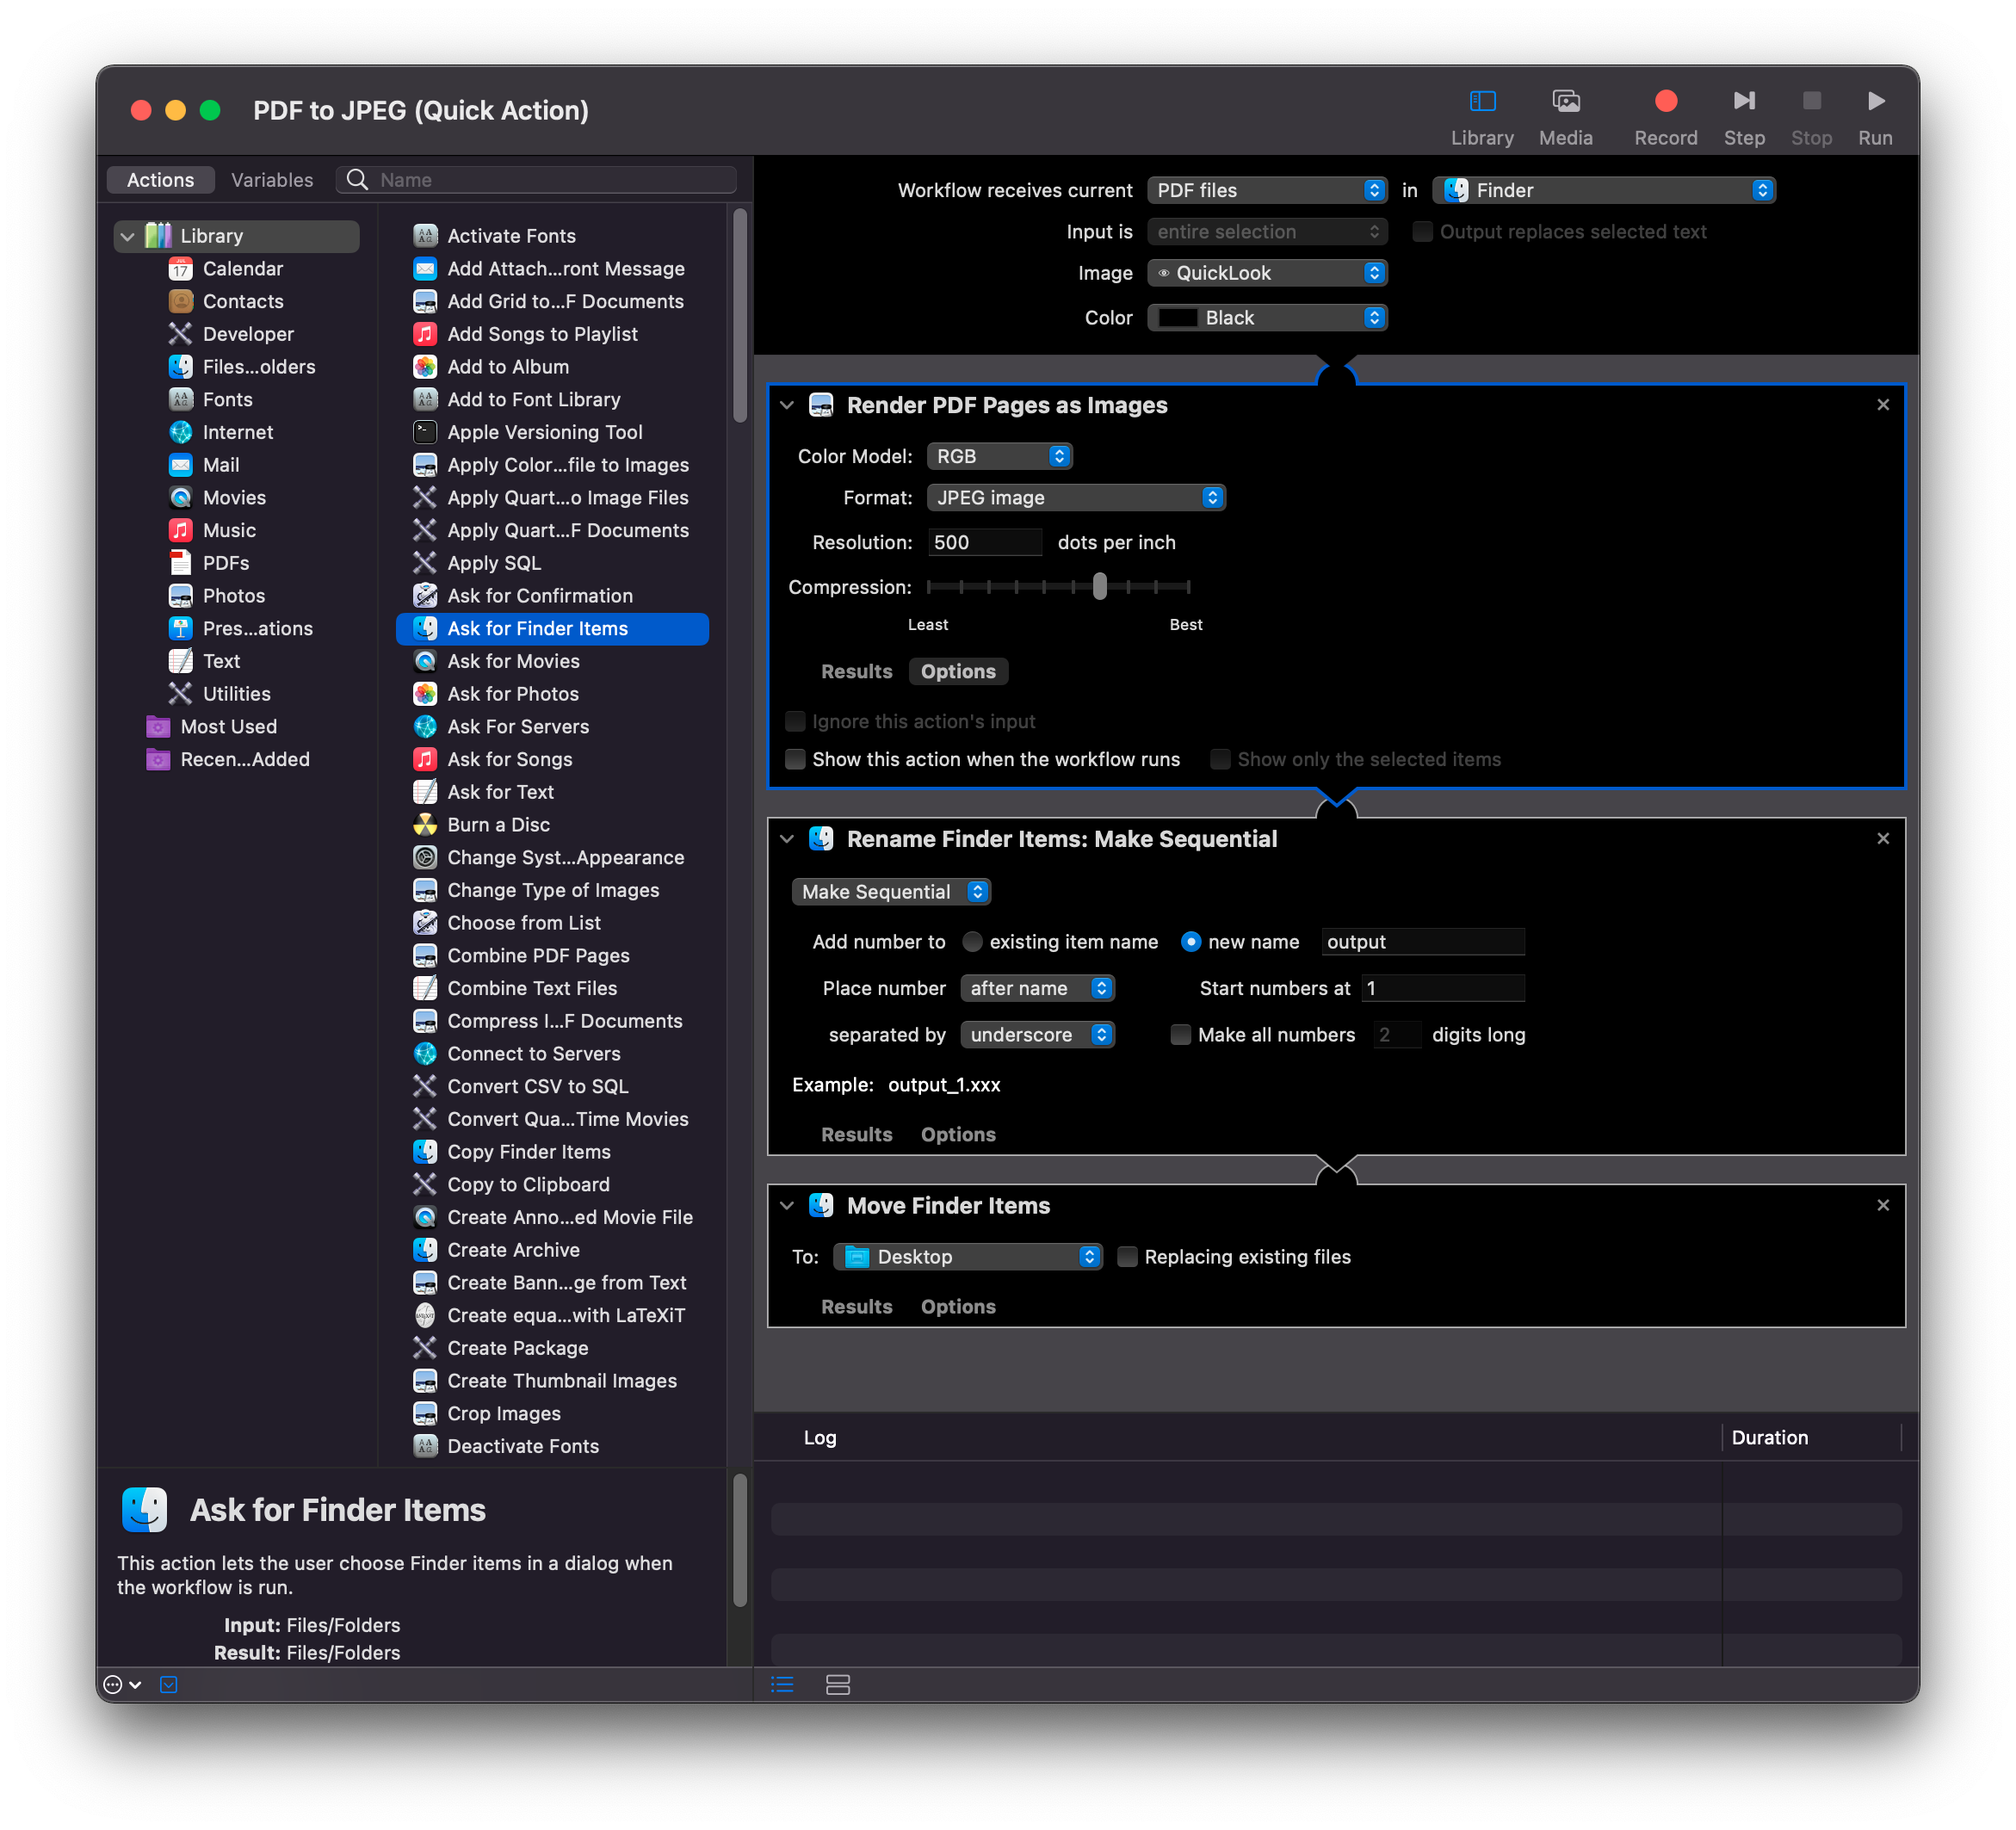
- Open Automator and create a new Quick Action
- At the top: Workflow receives
PDF filesinFinder - Then search for
Render PDF Pages as Imagesand drop the action into the main page. Set resolution to your needs - Now search for
Rename Finder Itemsand drop it into the main page as a second step - Within that action, use the dropdown menu and set it to
Make sequential. Customize the file names of your outputs as needed - Add a final action:
Move Finder Itemsand set it to the desired location - Repeat steps 5 and 6 from the previous task to copy file paths and choose your shortcut
Copyright © Guilherme Duarte Garcia